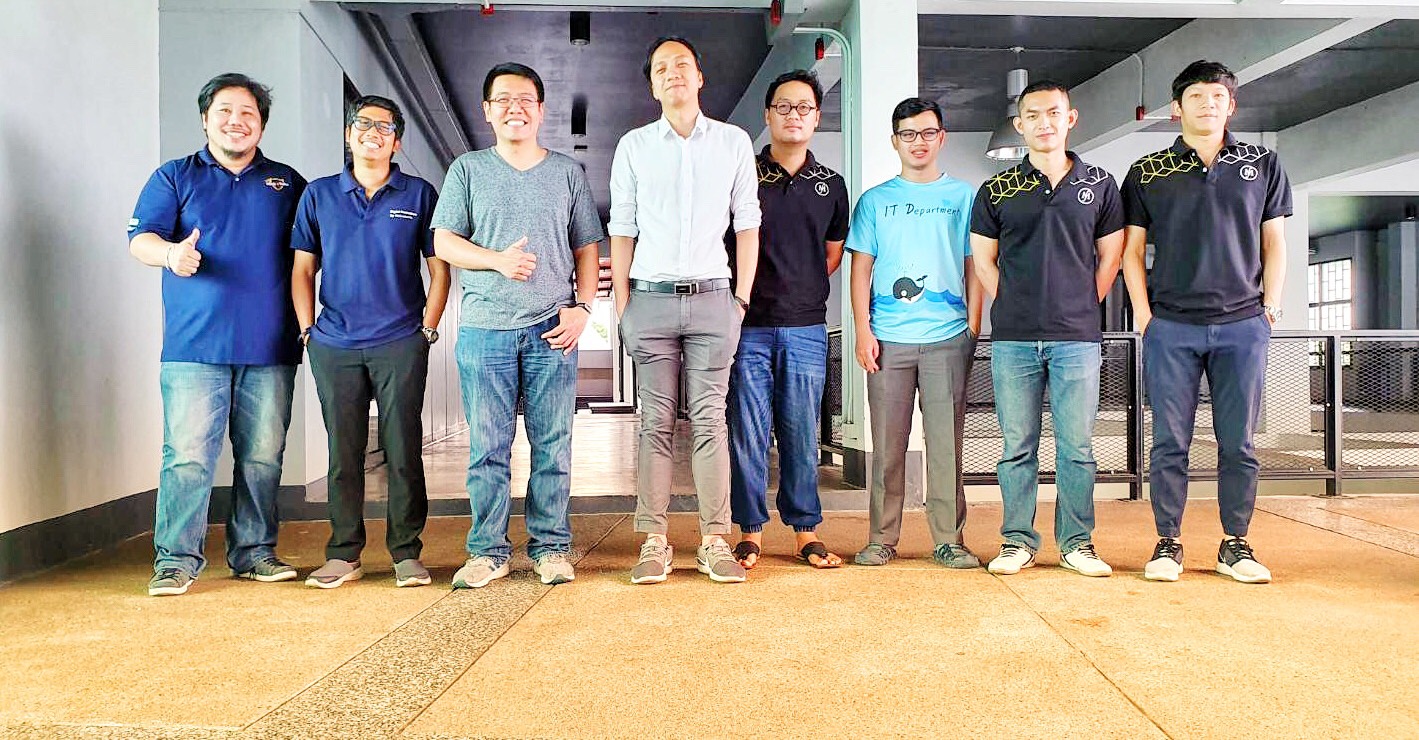
“CI/CD We Can” by #SonarCute!

CI/CD Process
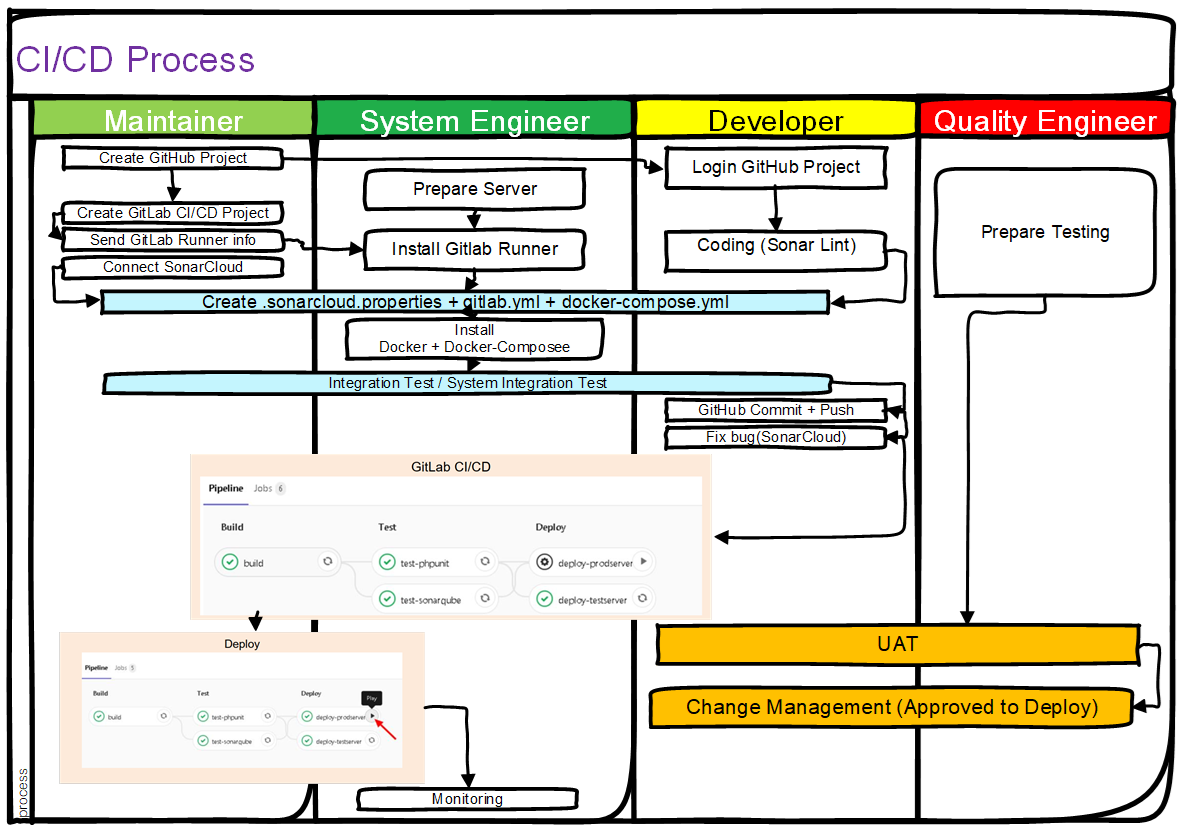
CI (continuous integration)
Step 1. Create GigHub Project, Create GitLab CI/CD Project, Develop source code
-
(Maintainer)
- Create GitHub Project
- สร้าง New repository บน GitHub
- เพิ่ม Collaborators ส่วนของผู้ใช้งานหรือ ที่จะมีสิทธิ์เข้ามาทำอะไรได้บ้าง โดยปกติจะเป็น Dev
- Create GitLab CI/CD Project
- Login GitLab
- Create new project
- Select CI/CD for external repo > Select GitHub
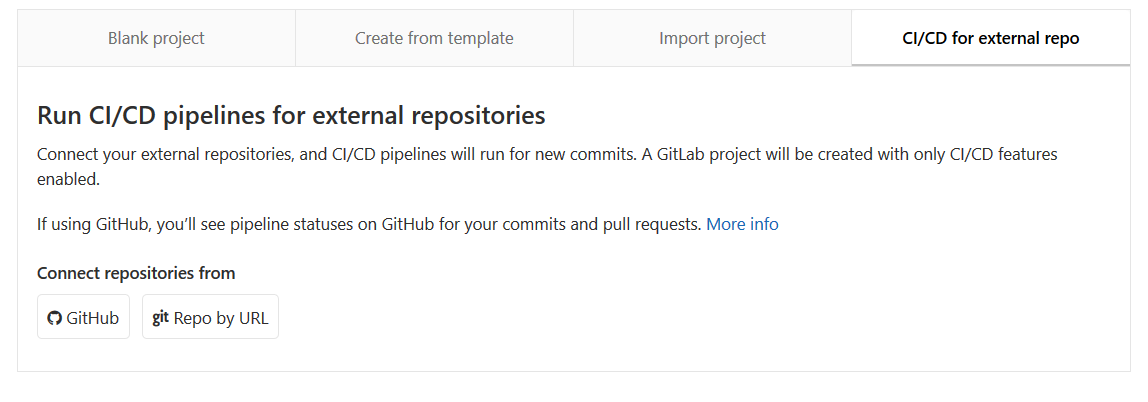
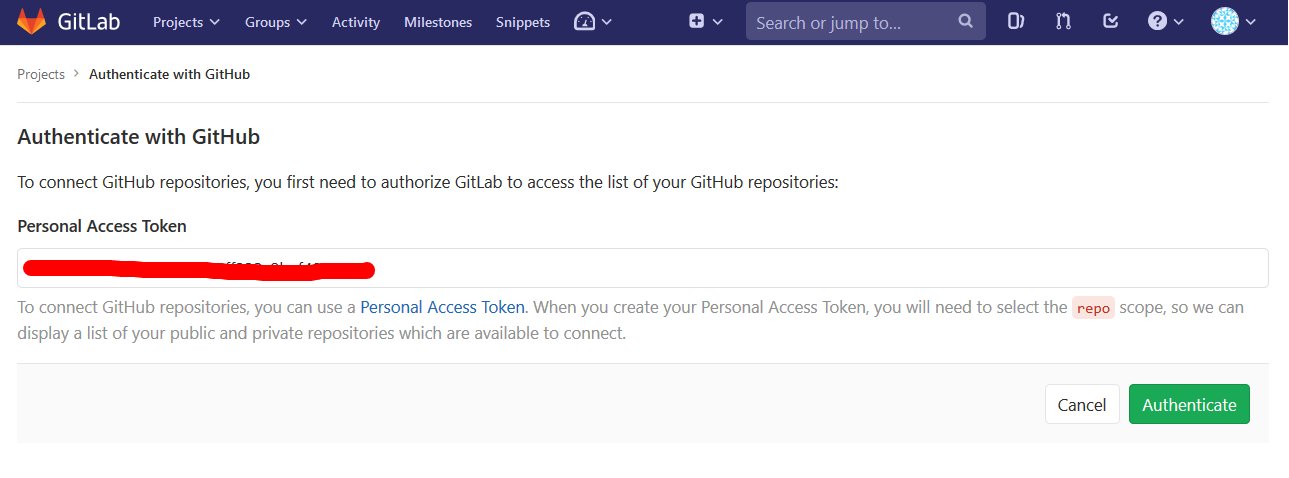
- Input GitHub Personal Access Token

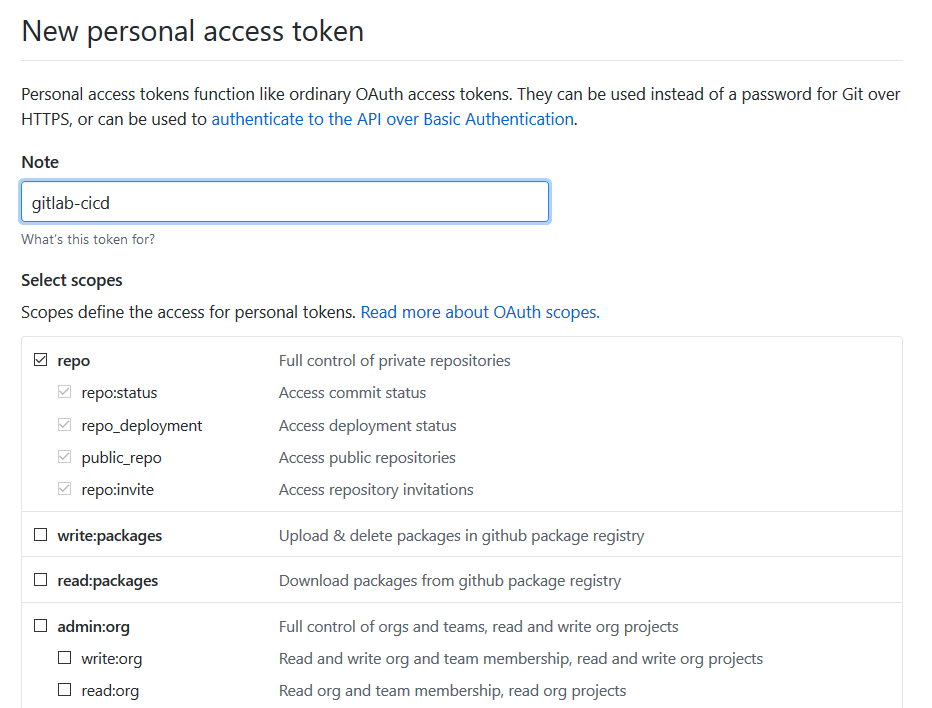
- Click Generate new token
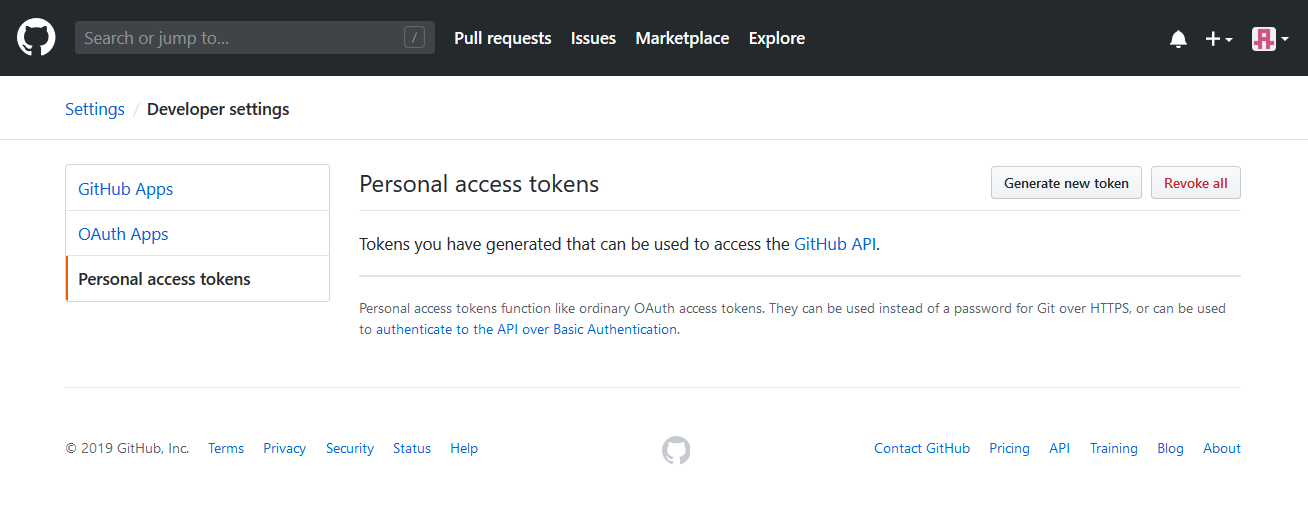
- Select scopes
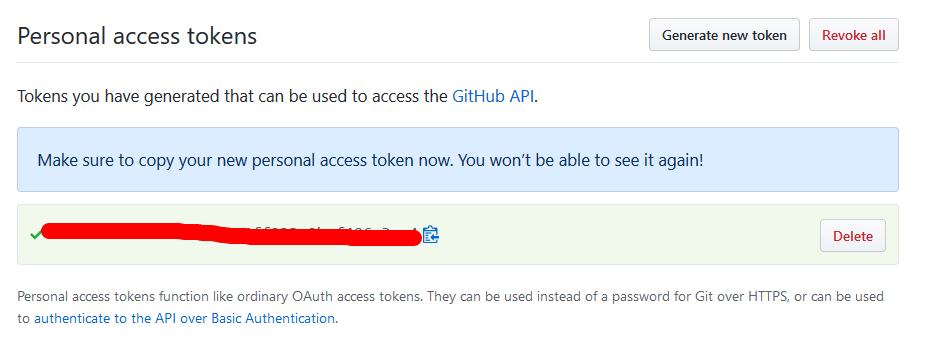
- Copy tokens
- Back to GitLab and input access token
- Select project to connect (click connect)

- (Github) create .gitlab-ci.yml
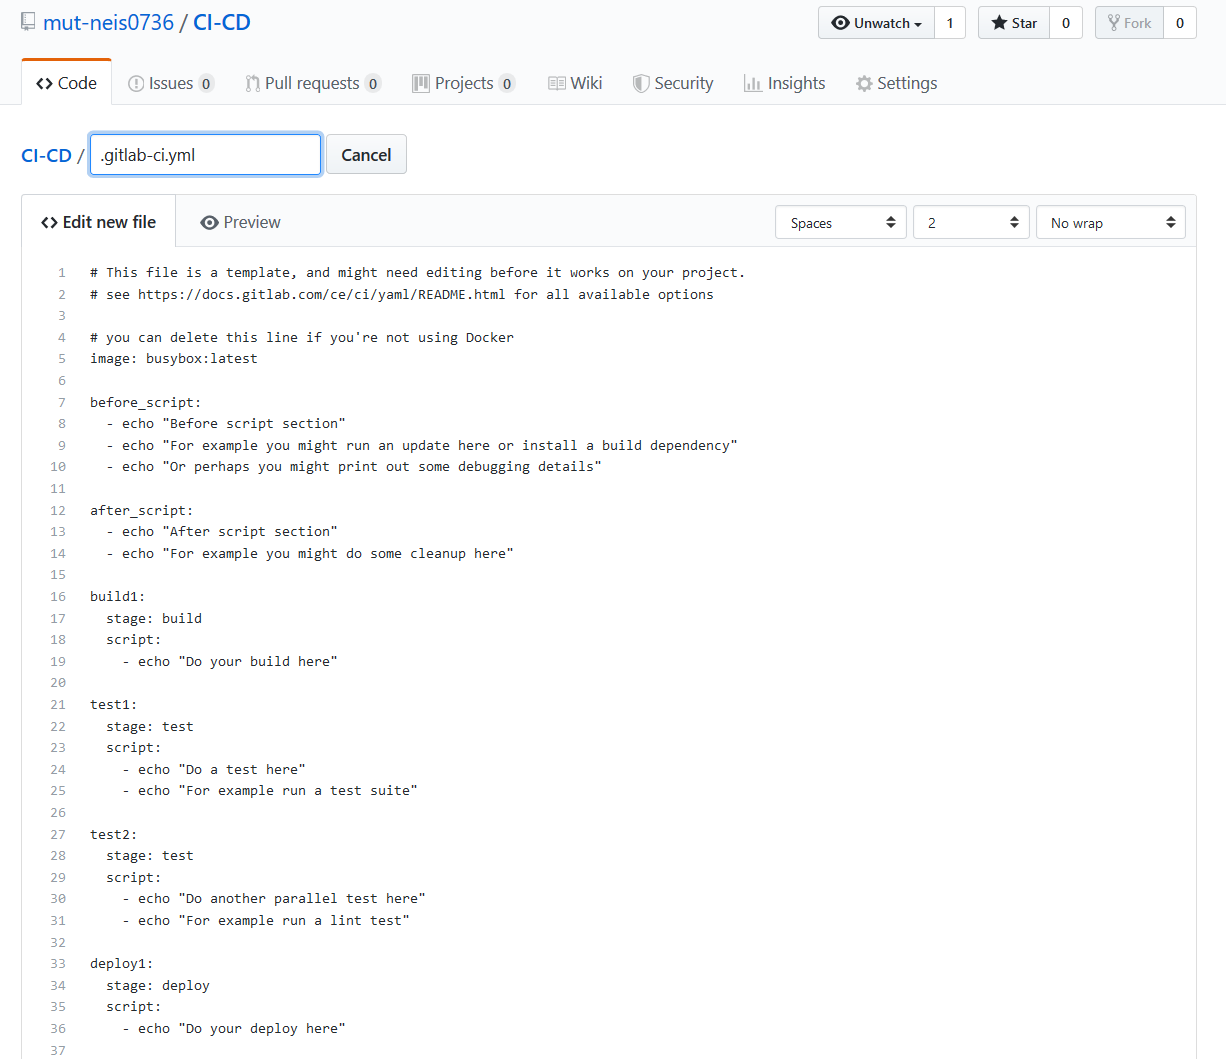
- หลังจากที่ Commit แล้วระบบจะสั่งการให้ GitLab CI/CD ทำงาน
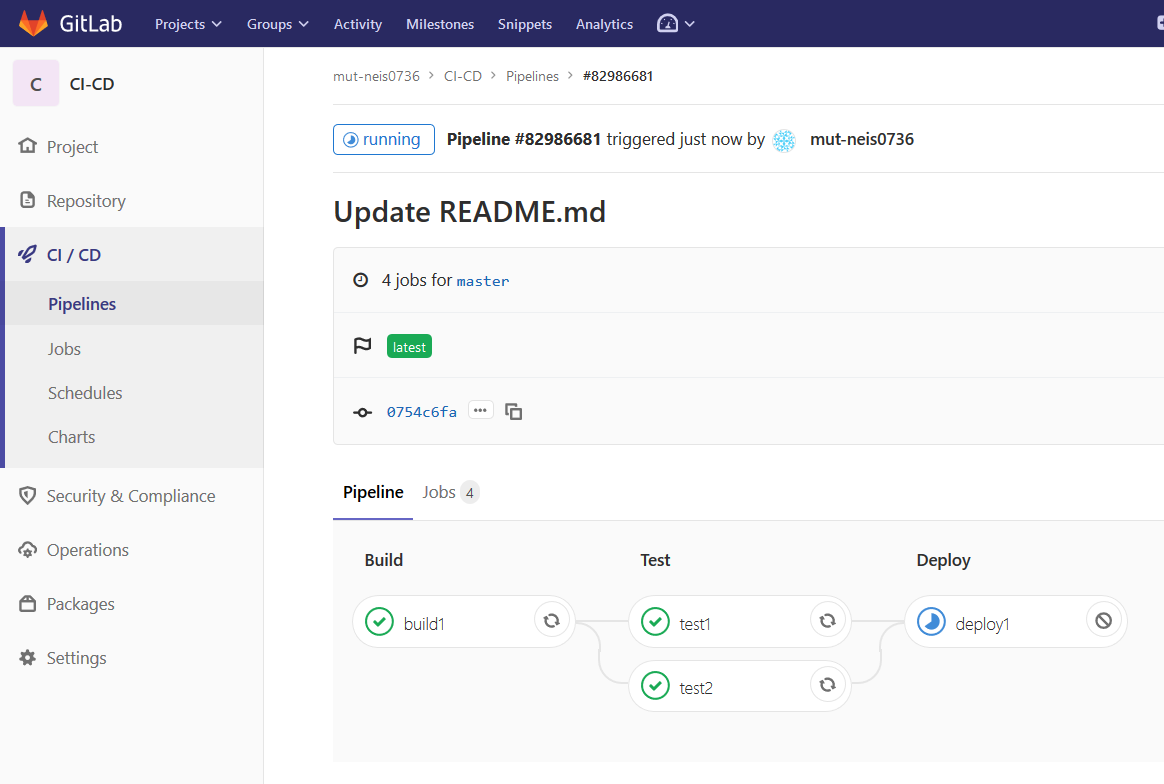
- Create GitHub Project
-
Ref.https://ardnarong.github.io/neis0736-cicd/Using%20GitLab%20CI-CD%20with%20a%20GitHub%20repository/
-
(Developer)
- login GitHub และใช้ sonar lint ในการพัฒนาซอสโค้ด
- Developer พัฒนาโปรแกรมโดย VS Code เป็น IDE ที่รองรับ SonarLint
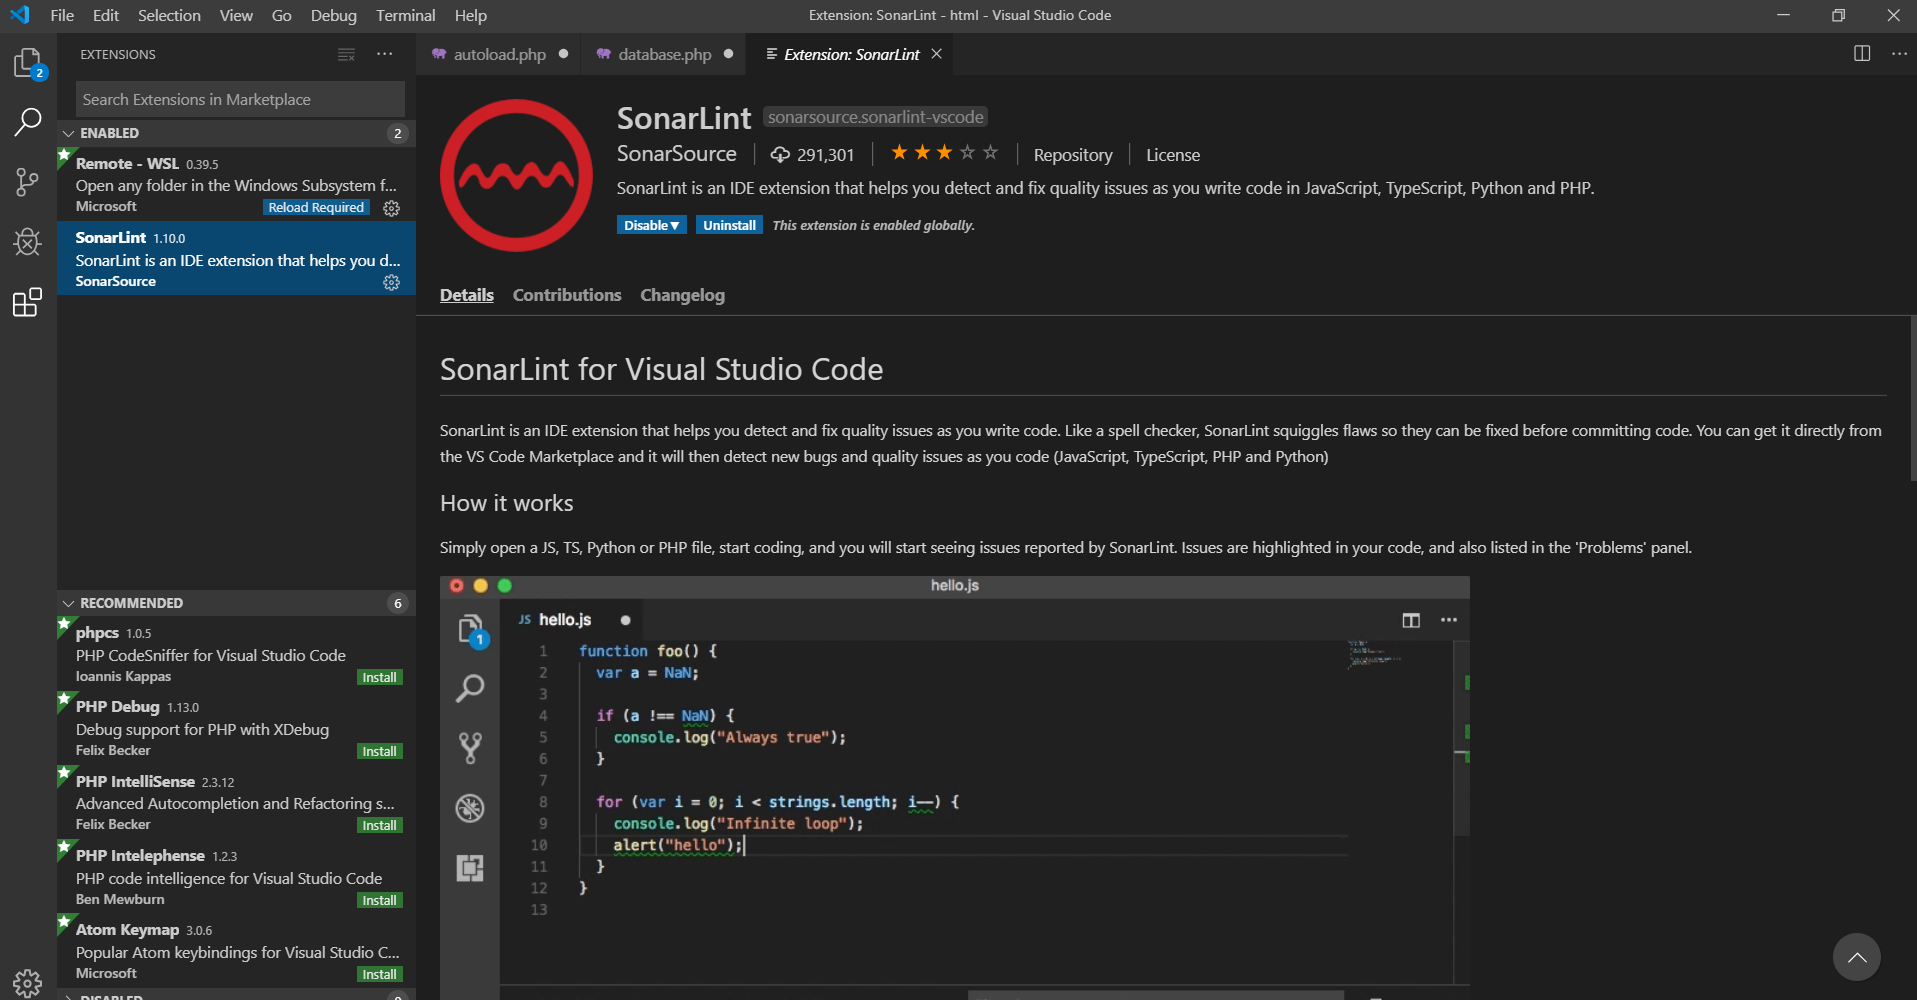
- เสร็จแล้วทำการ git Commit แล้ว git Push

- จากนั้น CI จะเริ่มทำงานตาม ไฟล์ .gitlab-ci.yml
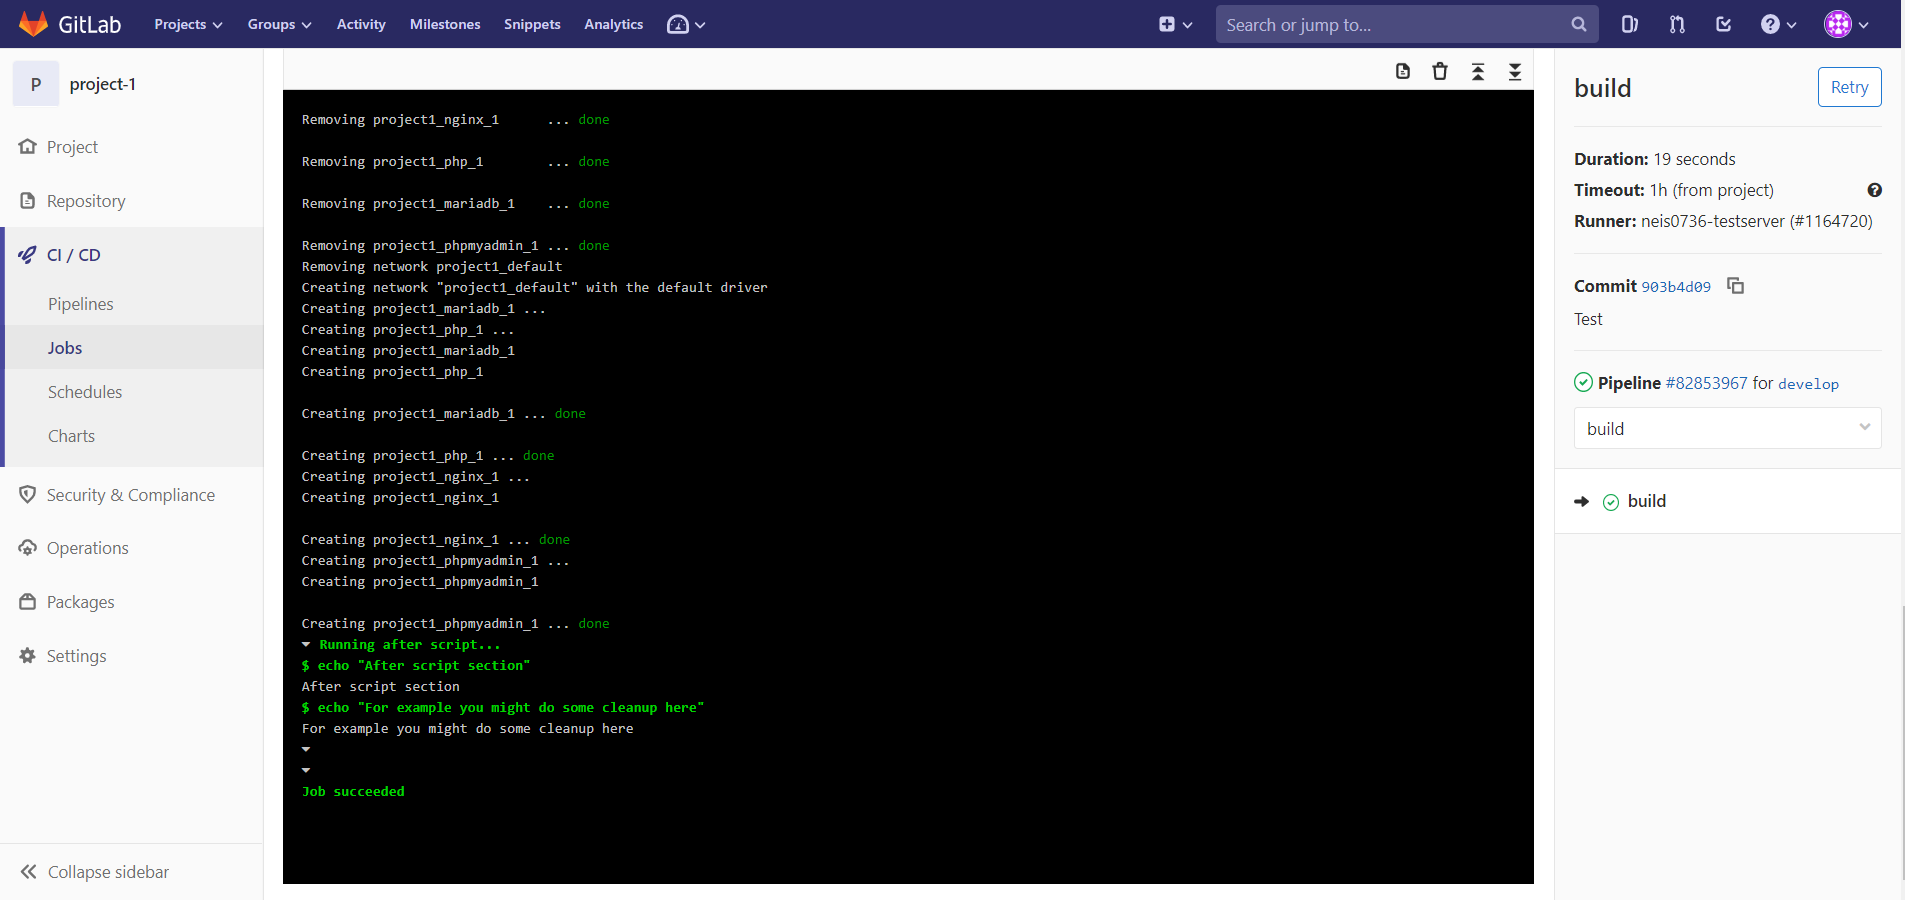

- ไปดูผลการ Review source code ที่ https://sonarcloud.io
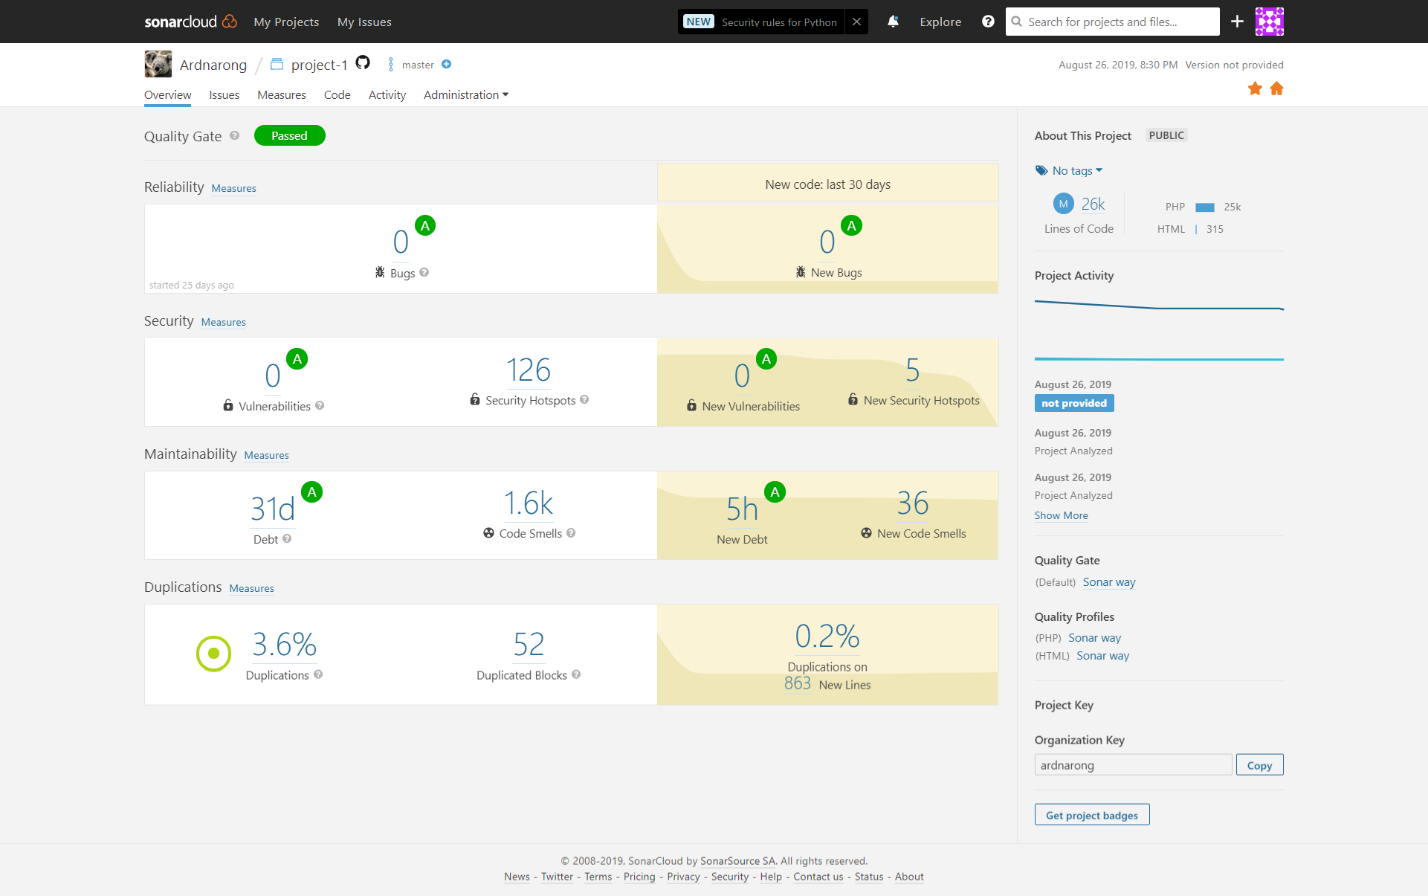
- Ref.https://ardnarong.github.io/neis0736-cicd/Improving%20code%20quality%20with%20SonarQube/
- Developer พัฒนาโปรแกรมโดย VS Code เป็น IDE ที่รองรับ SonarLint
- login GitHub และใช้ sonar lint ในการพัฒนาซอสโค้ด
Step 2. Send GitLab Runner info, Prepare server and install Gitlab Runner
- (Maintainer)
- Send Gitlab Runner info เพื่อให้ system admin ทำการ install Gitlab runner
- Login GitLab
- Go to setting menu > CI/CD > Runner and click expand

- ส่งข้อมูลด้านล่างนี้ให้กับ System Admin เพื่อติดตั้ง GitLab Runner บน Server
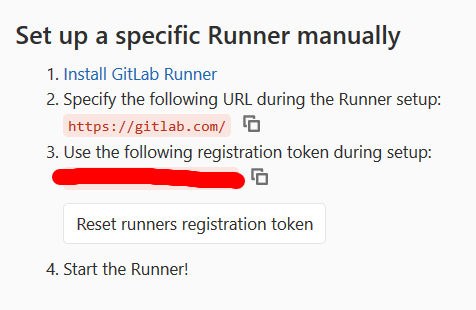
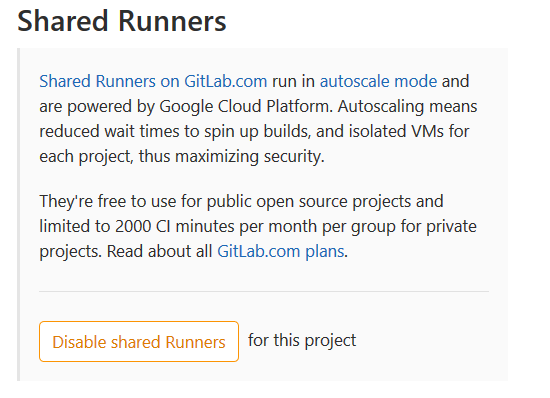
- ทำการปิด Shared Runners โดยคลิกที่ Disable Shared Runners
- Ref.https://ardnarong.github.io/neis0736-cicd/Maintainer%20send%20GitLab%20runner%20token%20to%20System%20Admin/
- Send Gitlab Runner info เพื่อให้ system admin ทำการ install Gitlab runner
- (System Engineer)
- Prepare Server and install Gitlab Runner
- IP : aaa.bbb.ccc.ddd
- username : xxx
- password : yyy
- Install Docker and Docker Compose -> Done
- https://github.com/NaturalHistoryMuseum/scratchpads2/wiki/Install-Docker-and-Docker-Compose-(Centos-7)
- Install GitLab Runner -> Done
- https://docs.gitlab.com/runner/install/linux-repository.html
- Registering Runners -> Done
- https://docs.gitlab.com/runner/register/index.html
- Grant sudo permissions
- You can grant sudo permissions to the gitlab-runner user as this is who is executing the build script.
- $ sudo usermod -a -G sudo gitlab-runner
- You now have to remove the password restriction for sudo for the gitlab-runner user.
- Start the sudo editor with
- $ sudo visudo Now add the following to the bottom of the file
- gitlab-runner ALL=(ALL) NOPASSWD: ALL
- You can grant sudo permissions to the gitlab-runner user as this is who is executing the build script.
- Ref.https://ardnarong.github.io/neis0736-cicd/System%20Admin%20Prepare%20Server/
- Prepare Server and install Gitlab Runner
Step 3. Connect GitHub กับ Sonar Cloud
- (Maintainer)
- ทำการเชื่อมต่อ GitHub กับ Sonar Cloud
- Login Sounar cloud with github account
- Click Create a new project

- Click Choose and organization on GitHub
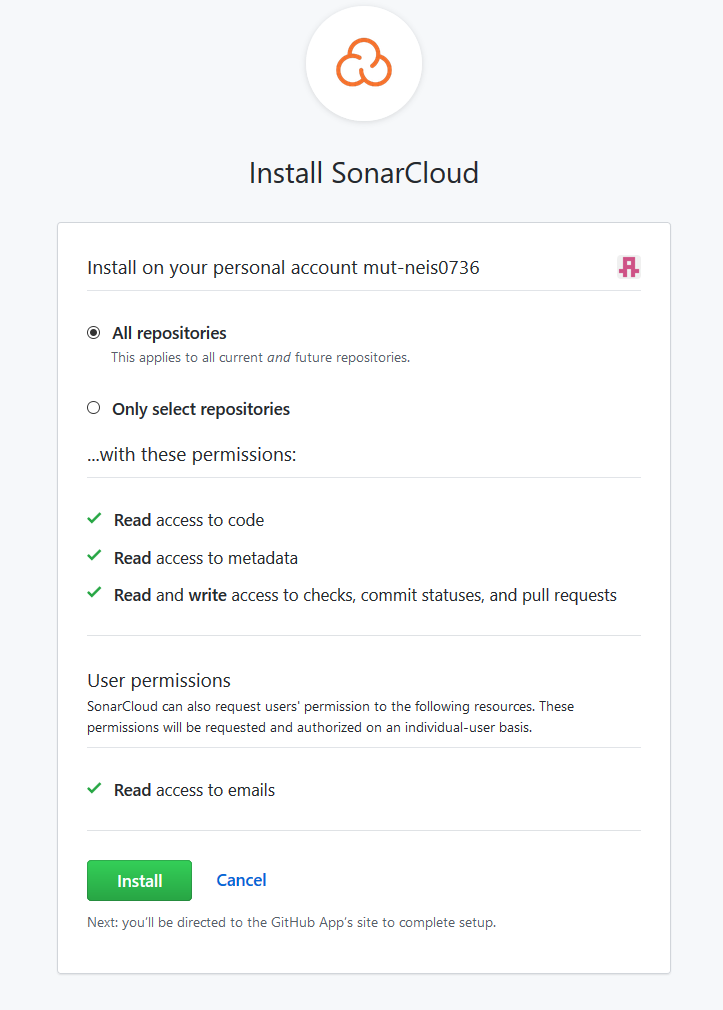
- Install SonarCloud on github account
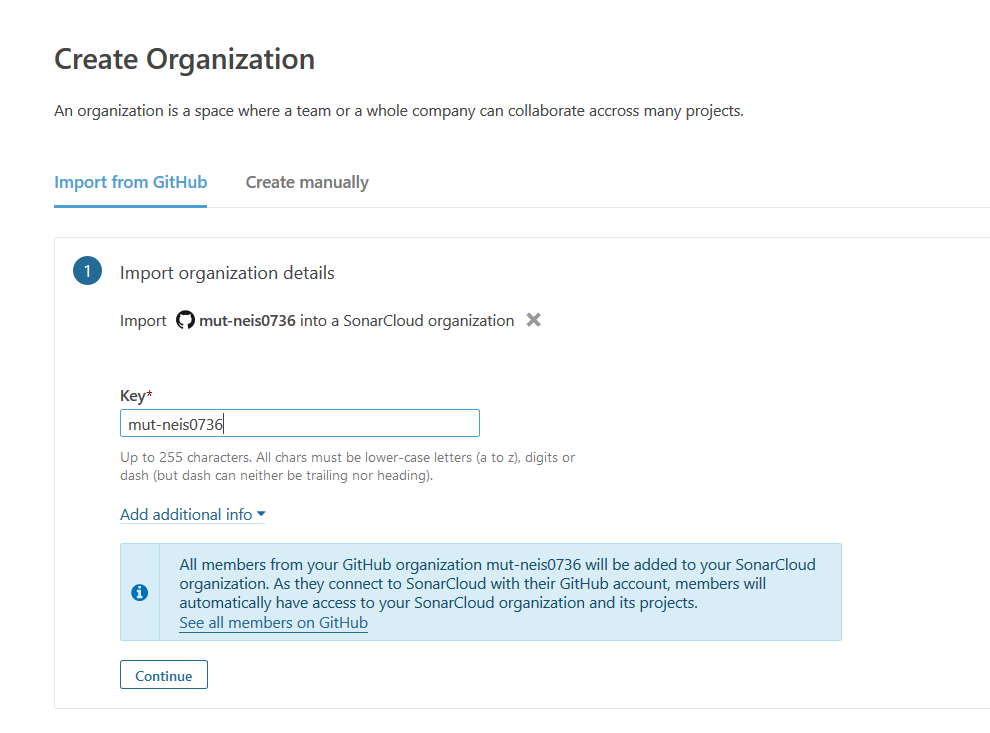
- Click Continue
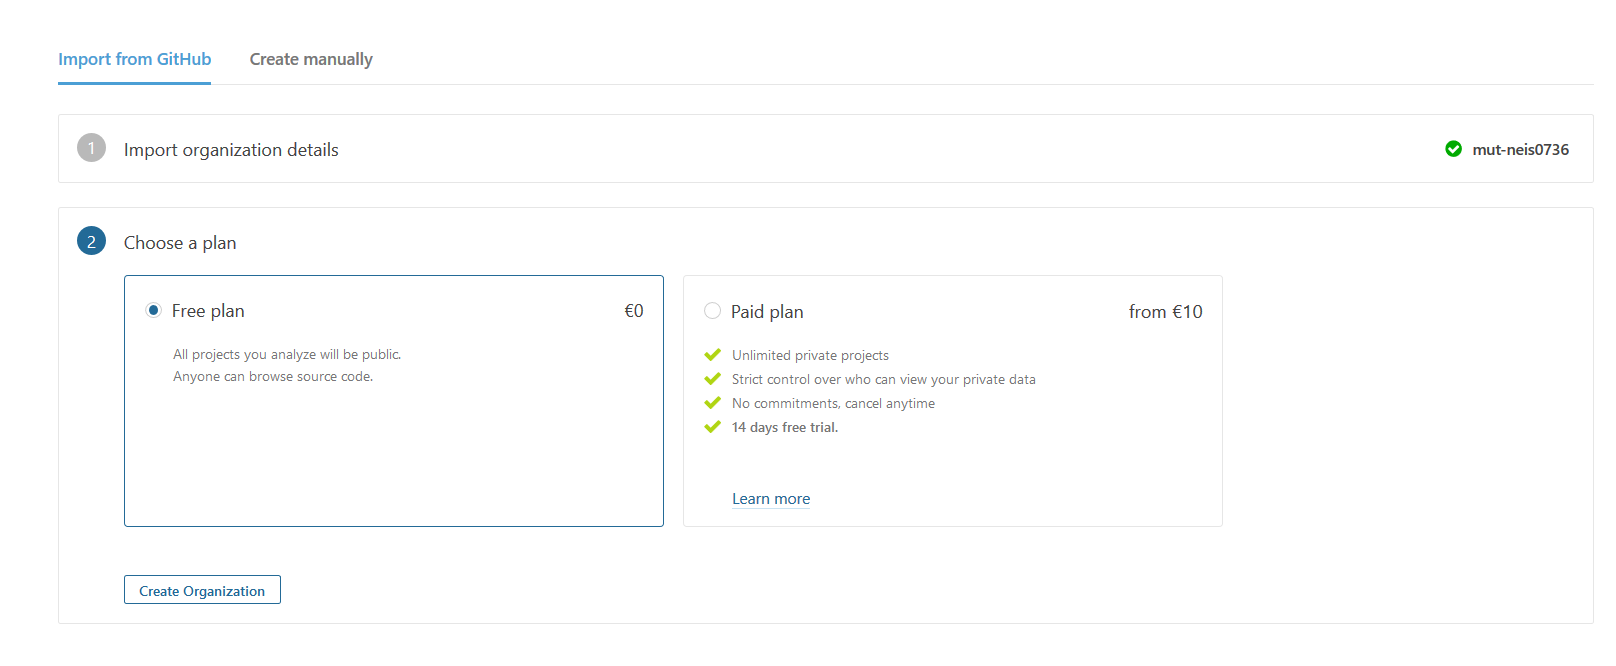
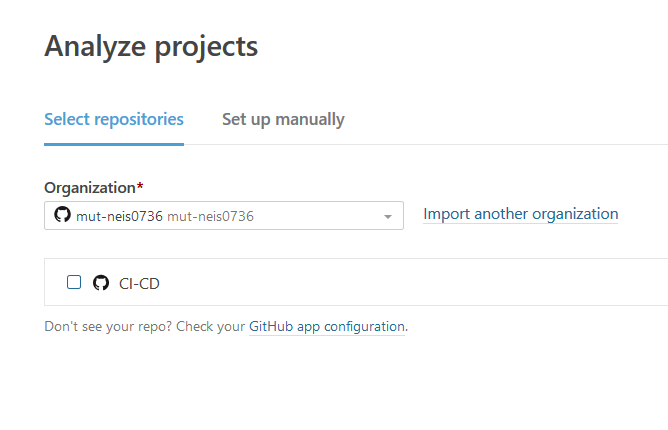
- Choose a Free plan
- Select github repositories for analysis
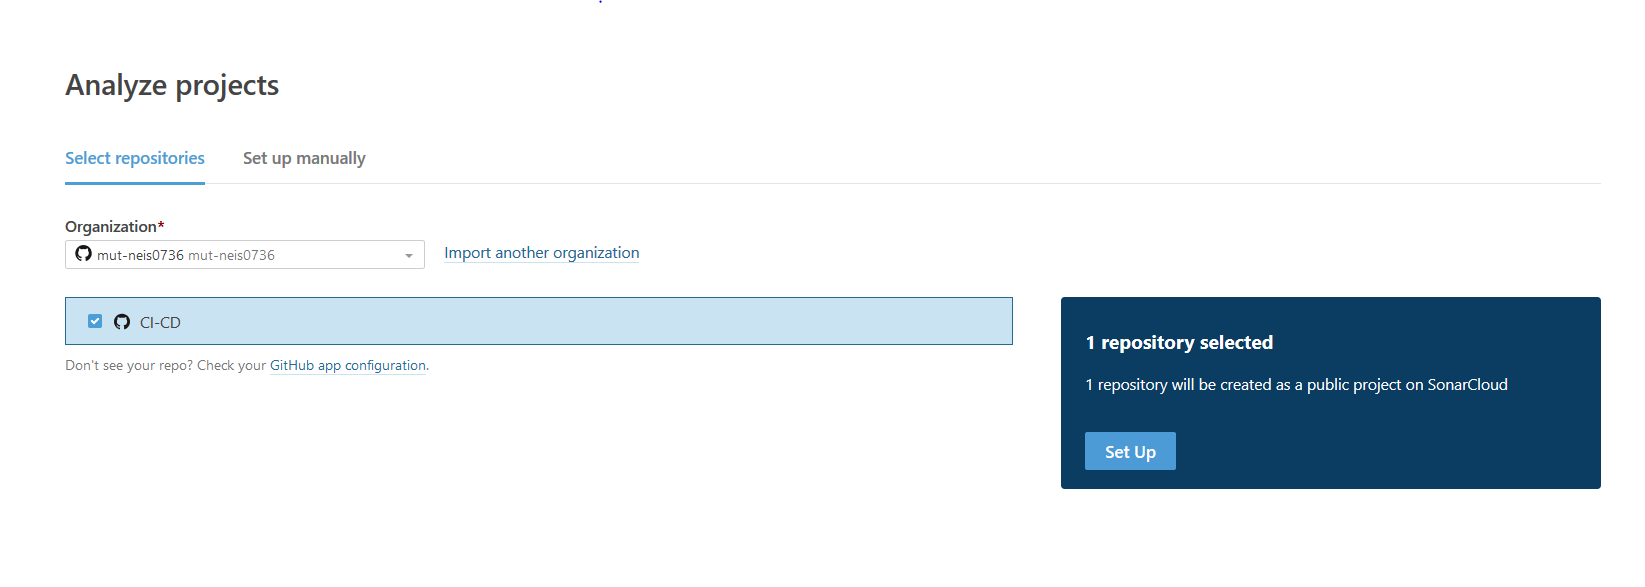
- Select “With other CI tools”
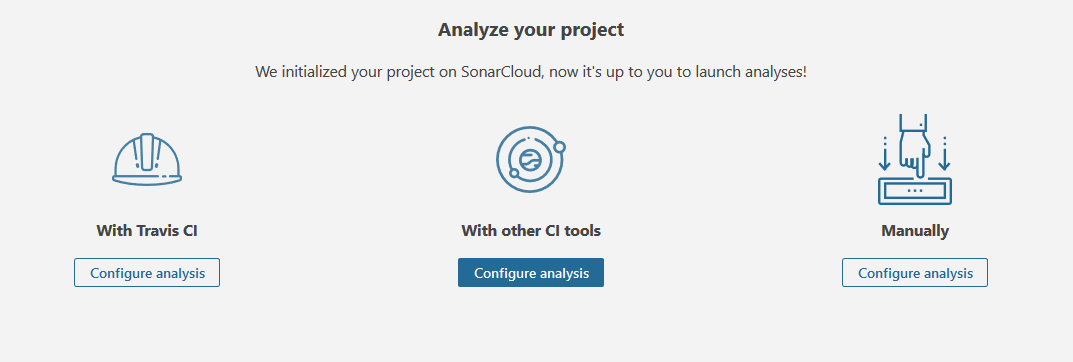
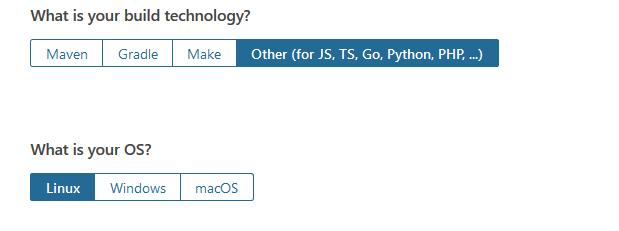
- Select build technology
- Sonarcloud show script for install
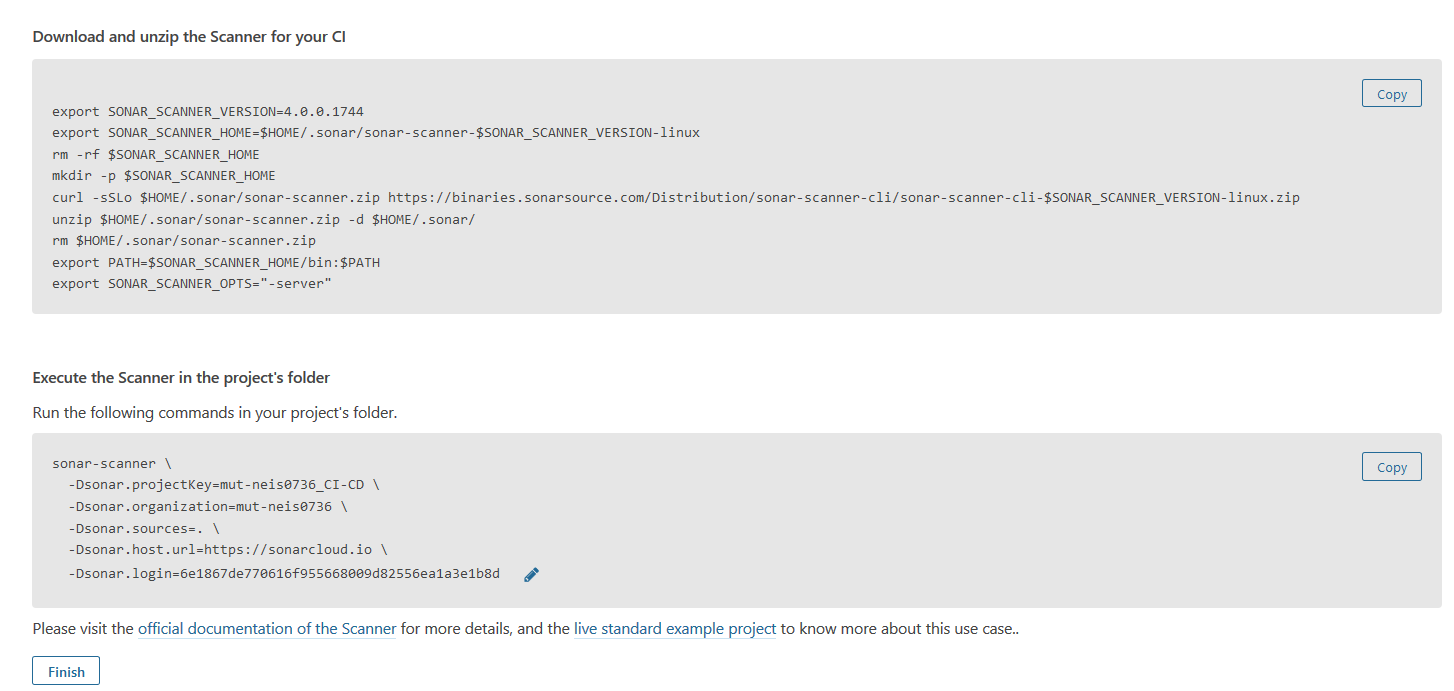
- Ref.https://ardnarong.github.io/neis0736-cicd/github-and-sonarcloud/
- ทำการเชื่อมต่อ GitHub กับ Sonar Cloud
Step 4. Discusstion process CI stage (Build, Test, Deploy)
- (Maintainer)(System Engineer)(Developer)
- Process CI Stage
- ใช้ Docker(docker-compose.yml) test (Review code ) ใช้ Sonar Cloud ทั้งหมดทำงานด้วย .gitlac-ci.ymlDeveloper จึง Commit และ push code ที่ทำการแก้ไขแล้วเสร็จจากการตรวจของ Sonar Cloud ไปให้ Gitlab CI/CD project

- Ref.https://ardnarong.github.io/neis0736-cicd/Improving%20code%20quality%20with%20SonarQube/images/img%20(4).png
- ใช้ Docker(docker-compose.yml) test (Review code ) ใช้ Sonar Cloud ทั้งหมดทำงานด้วย .gitlac-ci.ymlDeveloper จึง Commit และ push code ที่ทำการแก้ไขแล้วเสร็จจากการตรวจของ Sonar Cloud ไปให้ Gitlab CI/CD project
- Process CI Stage
Step 5. UAT
- (Quality Engineer)
- ทำ UAT หลังจาก Develop ผ่านการแก้ไขจะเข้าสู่กระบวนการ Change เพื่อทำการ Deploy production
- Test Case-Add User
- Preconditons :
- ระบบที่เปิดให้บริการ
- ข้อมูลของ User ที่จะต้องทำการ Add
- Aciton :
- Login เข้าสู่ระบบ
- เข้าเมนู User
- กดปุ่ม “+Add New”
- กรอกข้อมูลของ User ที่ต้องทำการ Add
- กดปุ่ม “Submit” เพื่อเพิ่ม User
- Input :
- Full name
- Email Address
- Default Password
- Mobile Number
- Role
- Expected Result :
- เพิ่มข้อมูลของ User ที่ต้องการ Add
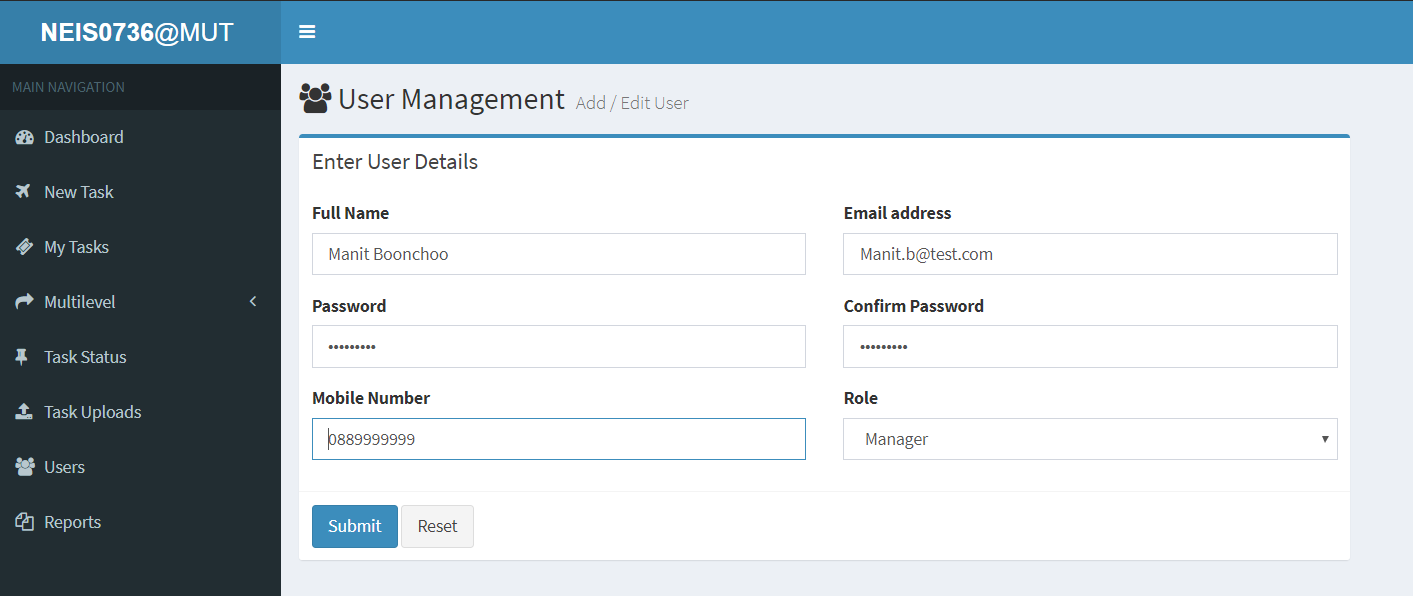
- สามารถ Add User ได้โดยไม่เกิด Error

- มี User ที่ทำการเพิ่ม อยู่ในระบบ

- เพิ่มข้อมูลของ User ที่ต้องการ Add
- Preconditons :
- Test Case-Delete User
- Preconditons :
- ระบบที่เปิดให้บริการ
- User ในระบบ
- Aciton :
- Login เข้าสู่ระบบ
- เข้าเมนู User
- เลือก User ที่ต้องการแก้ไขข้อมูล
- กดปุ่ม Delete เพื่อลบ User
- Input :
- User
- Expected Result :
- แสดงข้อความ “Are you sure to delete this user ?” ก่อนทำการลบ User

- แสดงข้อความ “User successfully deleted” เพื่อให้ทราบว่าทำการลบ User สำเร็จ

- ในระบบไม่มี User ที่ทำการลบไปแล้ว

- แสดงข้อความ “Are you sure to delete this user ?” ก่อนทำการลบ User
- Preconditons :
-
Test Case-Edit User
- Preconditons :
- ระบบที่เปิดให้บริการ
- User ในระบบที่จะต้องทำการแก้ไข
- ข้อมูลเบอร์โทรศัพท์ใหม่ของ User ที่จะต้องแก้ไข
- Aciton :
- Login เข้าสู่ระบบ
- เข้าเมนู User
- เลือก User ทำต้องการแก้ไขข้อมูล
- เปลี่ยนข้อมูลเบอร์โทรศัพท์
- กดปุ่ม Submit เพื่อแก้ไขข้อมูล
- Input :
- Mobile Number
- Expected Result :
- แสดงข้อมูล User ก่อนทำการแก้ไขข้อมูล

- สามารถแก้ไขข้อมูลของ User ได้
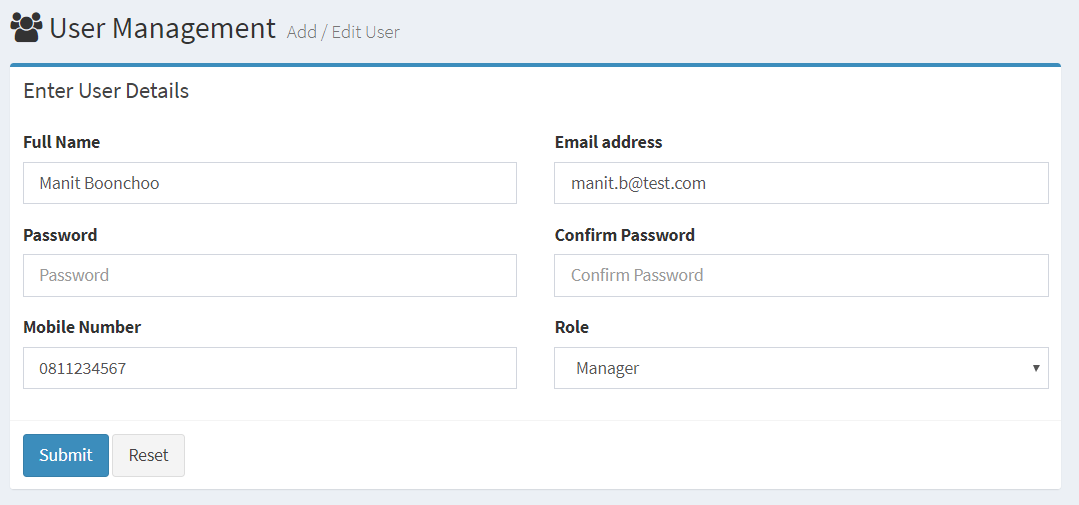
- ข้อมูลในระบบมีการเปลี่ยนแปลง

- แสดงข้อมูล User ก่อนทำการแก้ไขข้อมูล
- Preconditons :
- Test Case-Login Fail
- Preconditons :
- Email Address
- Password
- Aciton :
- กรอก Email Address ผิดในช่อง
- กรอก Password ผิดในช่อง
- กดปุ่ม Sign In
- Input :
- Email และ Password
- Expected Result :
- ไม่สามารถเข้าใช้งานได้ พร้อมทั้งมีแจ้งชื่อผู้ใช้งานหรือรหัสผ่านผิด
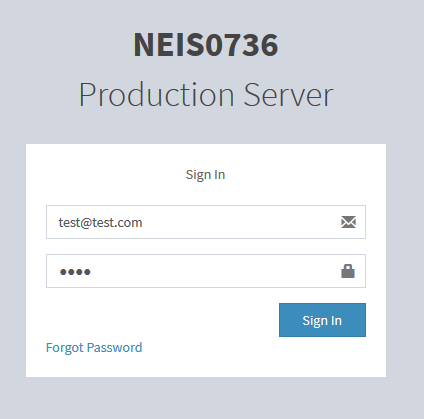
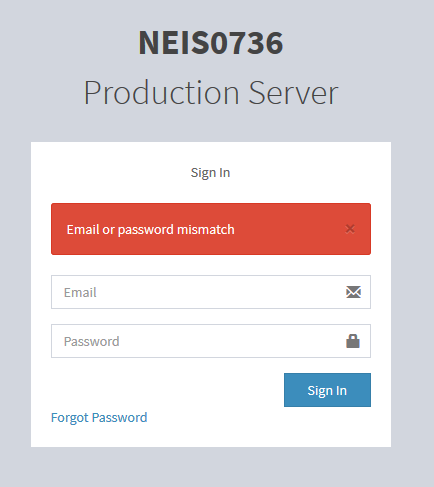
- ไม่สามารถเข้าใช้งานได้ พร้อมทั้งมีแจ้งชื่อผู้ใช้งานหรือรหัสผ่านผิด
- Preconditons :
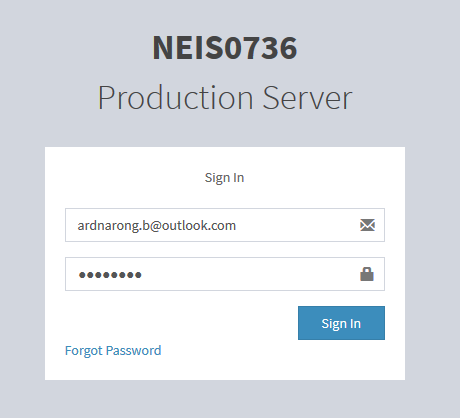
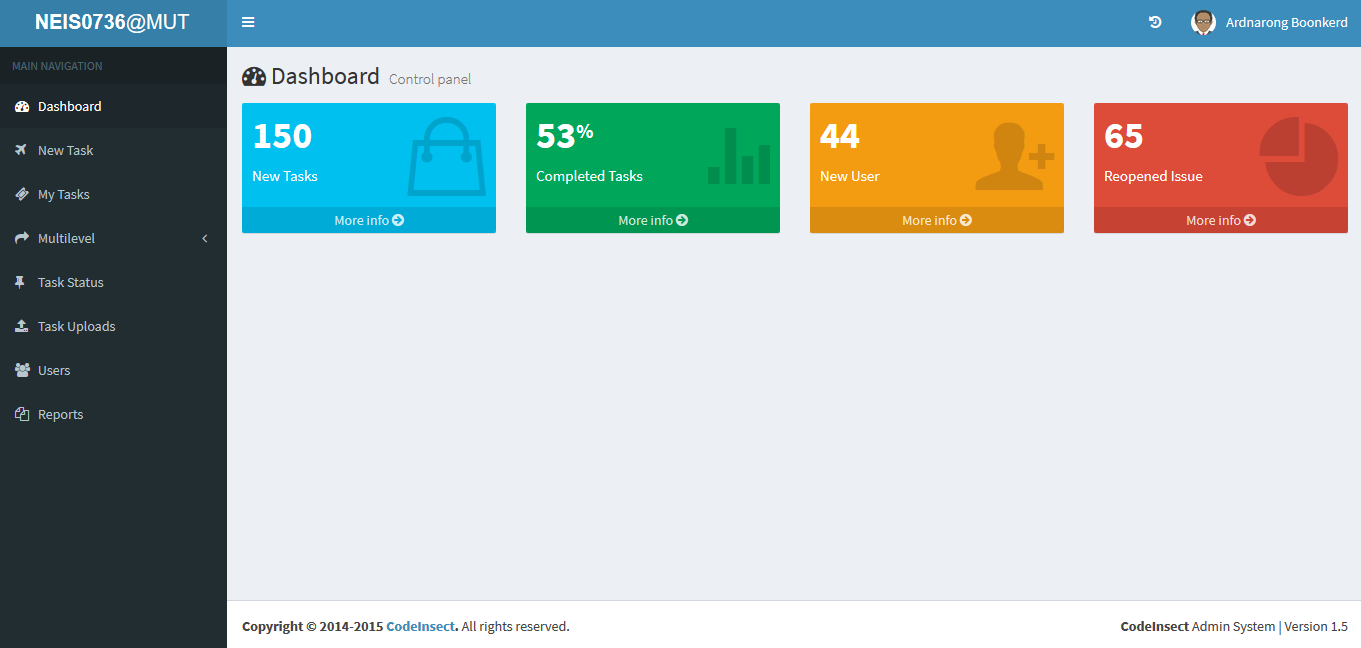
- Test Case-Login Success
- Preconditons :
- Email Address
- Password
- Aciton :
- กรอก Email Address ผิดในช่อง
- กรอก Password ผิดในช่อง
- กดปุ่ม Sign In
- Input :
- Email และ Password
- Expected Result :
- สามารถ Login เข้าใช้งานได้สำเร็จ
- Post Conditions : สามารถเข้าสู่ระบบและใช้งานระบบได้อย่างปรกติ
- Preconditons :
- Test Case-Add User
- ทำ UAT หลังจาก Develop ผ่านการแก้ไขจะเข้าสู่กระบวนการ Change เพื่อทำการ Deploy production
CD (continuous deployment)
Step 6. Deploy and Monitoring
- (System Engineer)
- Deploy production
- Login GitLab
- Goto menu CI/CD -> Pipeline
- On stage deploy prodcutin > Click Play
- System deploy passed
- Visite website
- Ref.https://ardnarong.github.io/neis0736-cicd/deploy/
- Monitoring
- prometheus ใช้สำหรับการมอนิเตอร์ docker, service ต่าง ๆ ของระบบ
- https://prometheus.io
- Zabbix ใช้สำหรับมอนิเตอร์ฮาร์ดแวร์
- https://www.zabbix.com
- Elastic Elastic SIEM ใช้สำหรับมอนิเตอร์ Event ต่าง ๆ
- https://www.elastic.co/products/siem
- prometheus ใช้สำหรับการมอนิเตอร์ docker, service ต่าง ๆ ของระบบ
- Deploy production
-
Team Member
- Ardnarong Boonkerd (Development Leader)
- Angkarn Pummarin (Project Facilitator)
- Suparath Suwannakorth (Maintainer)
- Sirimongkol Wongfu (System Engineer)
- Raksapon Leelachat (System Engineer)
- Pongpat Petchai (Quality Engineer)
- Tanapad Onsri (Quality Engineer)
- Maykin Warasart (Project Sponsor)
